Table of Contents
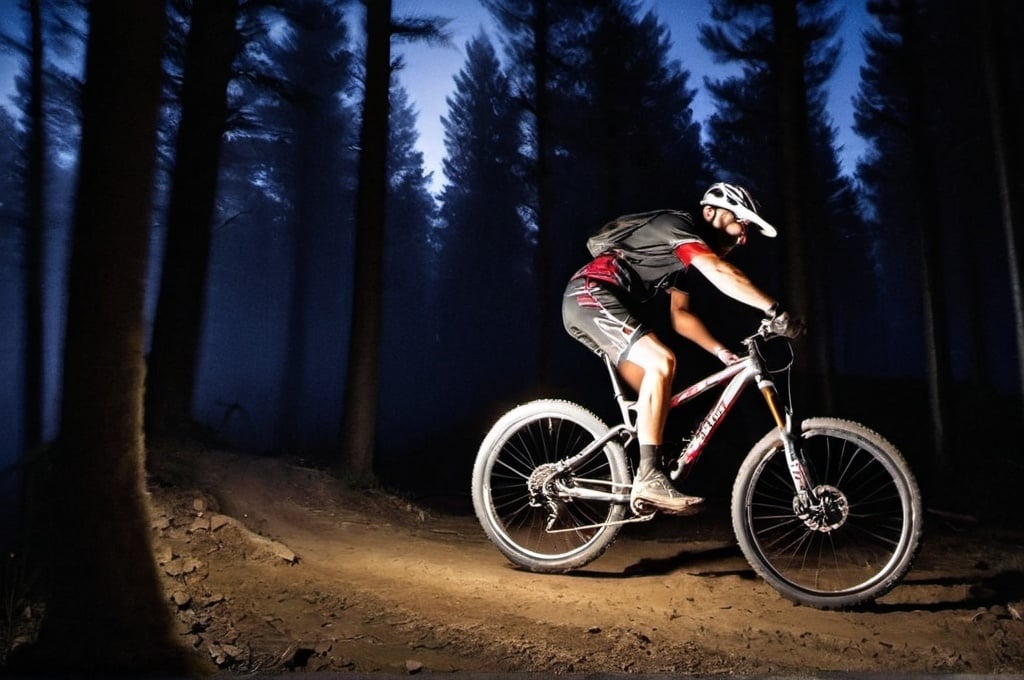
Introduction to Night Riding
Night riding offers mountain biking enthusiasts a unique and exhilarating experience. One significant benefit of night riding is the solitude it provides; popular trails are often empty, giving you the freedom to explore without encountering much foot traffic. Additionally, riding under the stars can be a surreal and peaceful experience that heightens your sensory awareness and builds your confidence in handling different terrains. The cooler nighttime temperatures are also a plus, providing a refreshing change from the heat of daytime riding.
Despite its advantages, night riding presents several challenges that need to be addressed. Visibility is the most obvious concern, requiring you to equip your bike and yourself with adequate lighting. Potential obstacles, such as rocks and tree roots, are harder to see in low-light conditions, necessitating better reaction skills. Preparation is key; familiarize yourself with your route and make sure you’re adequately prepared to tackle unexpected issues that may arise. Riding with a buddy or informing someone of your plans can help mitigate these risks.
When planning a night ride, it’s best to choose familiar terrain or trails that are well-maintained and predictable. Forest paths and fire roads are excellent choices as they are generally smoother and less technical, minimizing the risk of accidents. Another critical factor to consider is safety. Wear reflective clothing to increase your visibility to others and always carry a multi-tool, spare parts, and a first-aid kit. Inform someone of your intended route and estimated arrival time to ensure that emergency services can find you quickly if needed.
Essential Night Riding Gear
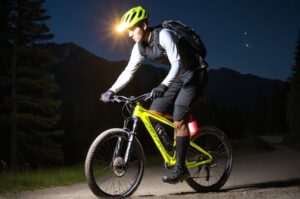
Proper lighting is crucial for successful night riding. Your primary lighting system should include both head and handlebar lights. Look for lights with high lumens, as these provide brighter illumination. Adjustable beam patterns are beneficial for adapting to various terrains, whether you’re traversing wide-open fields or narrow forest paths. Invest in durable lights designed specifically for mountain biking, as they often feature higher water and impact resistance.
Helmet lights offer several advantages, providing light directly in the direction you’re looking, which is particularly useful for navigating tight corners or spotting obstacles that your handlebar lights might miss. Installing a helmet light is relatively simple, but make sure it is securely fastened and balanced to avoid any discomfort or movement during your ride. Position the light slightly downward to reduce glare and improve visibility.
Reflective clothing and accessories are another must-have for night riding. Vests, gloves, and shoes with reflective material can significantly improve your visibility to others. Attach reflective decals to your bike frame and wheels as an additional measure. Carrying backup lights and extra batteries is essential; you don’t want to be caught in the dark should your primary lights fail. Opt for rechargeable battery packs and ensure they are fully charged before each ride.
Bike Setup for Night Riding
Properly installing and adjusting your lights is crucial for an effective MTB night riding setup. Begin by securing your handlebar lights at the center of your handlebars. The light beam should be angled slightly downward to avoid blinding oncoming riders while providing maximum ground illumination. For helmet lights, ensure they’re tightly secured and offer a wide range of motion. Test the lights in a dark environment to fine-tune their angles and brightness levels.
After installation, ensure all lights are secure and won’t shift during your ride. Any loose fixtures can not only hinder your visibility but also become potential hazards. Use reliable mounting systems, and double-check all fasteners. Adding reflective tape or decals to your bike frame and wheels enhances your visibility, making it easier for others to spot you in low-light conditions. Reflective elements should be placed strategically, such as on the spokes, seat stays, and forks.
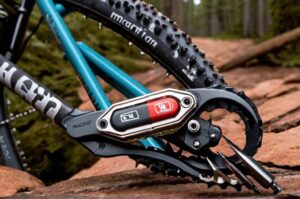
Night riding demands meticulous bike preparation. Ensuring that your bike is in top condition is vital for a safe ride. Check and adjust your brake performance to make sure they offer reliable stopping power, and keep your tires properly inflated for optimal grip and control. Consider using wider tires with more tread to handle the varying conditions you may face on night trails. A well-maintained bike boosts not only your performance but also your confidence on unfamiliar terrains.
Preparing Yourself for Night Rides
Proper clothing is critical when preparing bike for night trails. Dressing in layers helps you manage temperature fluctuations, which are common during the evening and nighttime hours. Start with a moisture-wicking base layer to keep sweat away from your skin, add an insulating layer for warmth, and top it off with a windproof and waterproof outer layer to shield against the elements. Don’t forget to bring a lightweight jacket stored in your backpack, just in case temperatures drop unexpectedly.
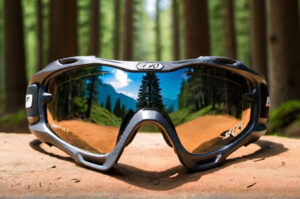
Choosing the right helmet and gloves is equally important. A helmet with built-in or mountable light systems offers an added layer of convenience and safety. Your gloves should provide ample grip and be weather-appropriate; opt for insulated gloves if riding in colder conditions. Familiarizing yourself with night-specific riding techniques is also essential. Reduce your speed slightly, as reaction times tend to be slower in the dark, and keep your weight balanced to navigate through obstacles smoothly.
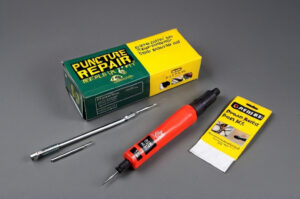
Carrying essential tools and spare parts can make the difference between a minor inconvenience and a full-blown emergency. Always have a multi-tool, tire levers, spare tubes, a patch kit, and a portable pump. It’s also wise to carry a fully charged mobile phone and a power bank for emergencies. Being well-prepared can help you tackle any unforeseen challenges effectively, ensuring a smoother and safer ride.
Trail Selection and Navigation
When embarking on your initial night rides, choosing well-known trails is highly recommended. Familiar routes reduce the likelihood of getting lost and allow you to focus more on adapting to the challenges of night riding rather than navigating unfamiliar territory. Trails with clear markings and minimal technical sections are ideal choices. Gradually, as you become more comfortable, you can venture onto more complex routes.
Efficient use of GPS devices and maps is indispensable for navigating in low-light conditions. Modern GPS units designed for mountain biking can guide you reliably through complex trails. Make sure you pre-load maps and routes before beginning your ride to avoid relying solely on cellular signals, which can be spotty in remote areas. Consider using smartphone apps with offline map capabilities as a backup.
Marking important waypoints on your GPS or map is a proactive measure to avoid getting lost. Significant intersections, water sources, and rest stops should be highlighted for easy reference. Recognizing and adapting to changes in trail conditions at night is crucial. Be extra vigilant for elements like wet leaves, loose gravel, or fallen branches, which may not be as visible. Adjusting your riding strategy to suit these conditions can help you navigate trails safely and efficiently.
Safety Precautions and Riding Techniques
Safety should always be a top priority when night riding. Inform someone of your planned route and expected time of arrival (ETA). This excellent practice allows for timely intervention should something go wrong. Agree on safety check-ins via phone or messaging apps to confirm your whereabouts at various stages of the ride. Always carry an identification card, emergency contact information, and a small first-aid kit.
Riding within your limits is essential to avoid accidents and maintain control. Night riding often requires you to adapt your speed and riding style. Avoid sharp turns at high speeds and be more conservative when tackling technical sections. Understanding the behavior of nocturnal wildlife is another important aspect. Animals are more active at night, and encounters can startle both you and the creature. Stay alert to avoid accidental collisions.
Staying calm and composed in unexpected situations, such as mechanical failures or sudden changes in weather, is critical. If you encounter a problem, assess the situation calmly and methodically. Having a contingency plan can ease your mind, making the entire experience more enjoyable. Practice basic repairs at home to prepare for potential issues, and always have the necessary tools and spares to address common problems.
Post-Ride Bike Maintenance
Cleaning your bike after a night ride is essential to remove any mud, dirt, or debris collected during your adventure. Use a gentle bike-specific cleaner and a soft brush to avoid damaging the frame and components. Paying special attention to the drivetrain, brakes, and tires helps maintain performance and prolong the lifespan of your bike. Don’t forget to dry your bike thoroughly to prevent rust or corrosion.
Inspecting lights and batteries for damage or wear is a critical post-ride task. Check if the mounting brackets are intact, and ensure there are no cracks or signs of wear on the lights themselves. Recharge batteries if needed and replace them if they show signs of diminished performance. Regularly maintaining your lighting system will ensure reliability and longevity.
After a night ride, check the condition and pressure of your tires. Look for punctures, cuts, or worn-out tread that may affect your next ride. Inflate the tires to the recommended pressure to ensure optimal performance and safety. Lastly, store your night riding gear properly. Clean and organize your lights, reflectors, and clothing to make them easily accessible for your next adventure. Proper storage extends the lifespan of your equipment and ensures you’re always ready to hit the trails.
“`